Friday, August 19, 2016
Philips AZ1010 – CD Radio Cassette Recorder – Circuit Diagram
Professional technician for all kind of electronic equipment. Doing since 1974.
Sony MDS S9 – Circuit diagram – Minidisc Deck
Professional technician for all kind of electronic equipment. Doing since 1974.
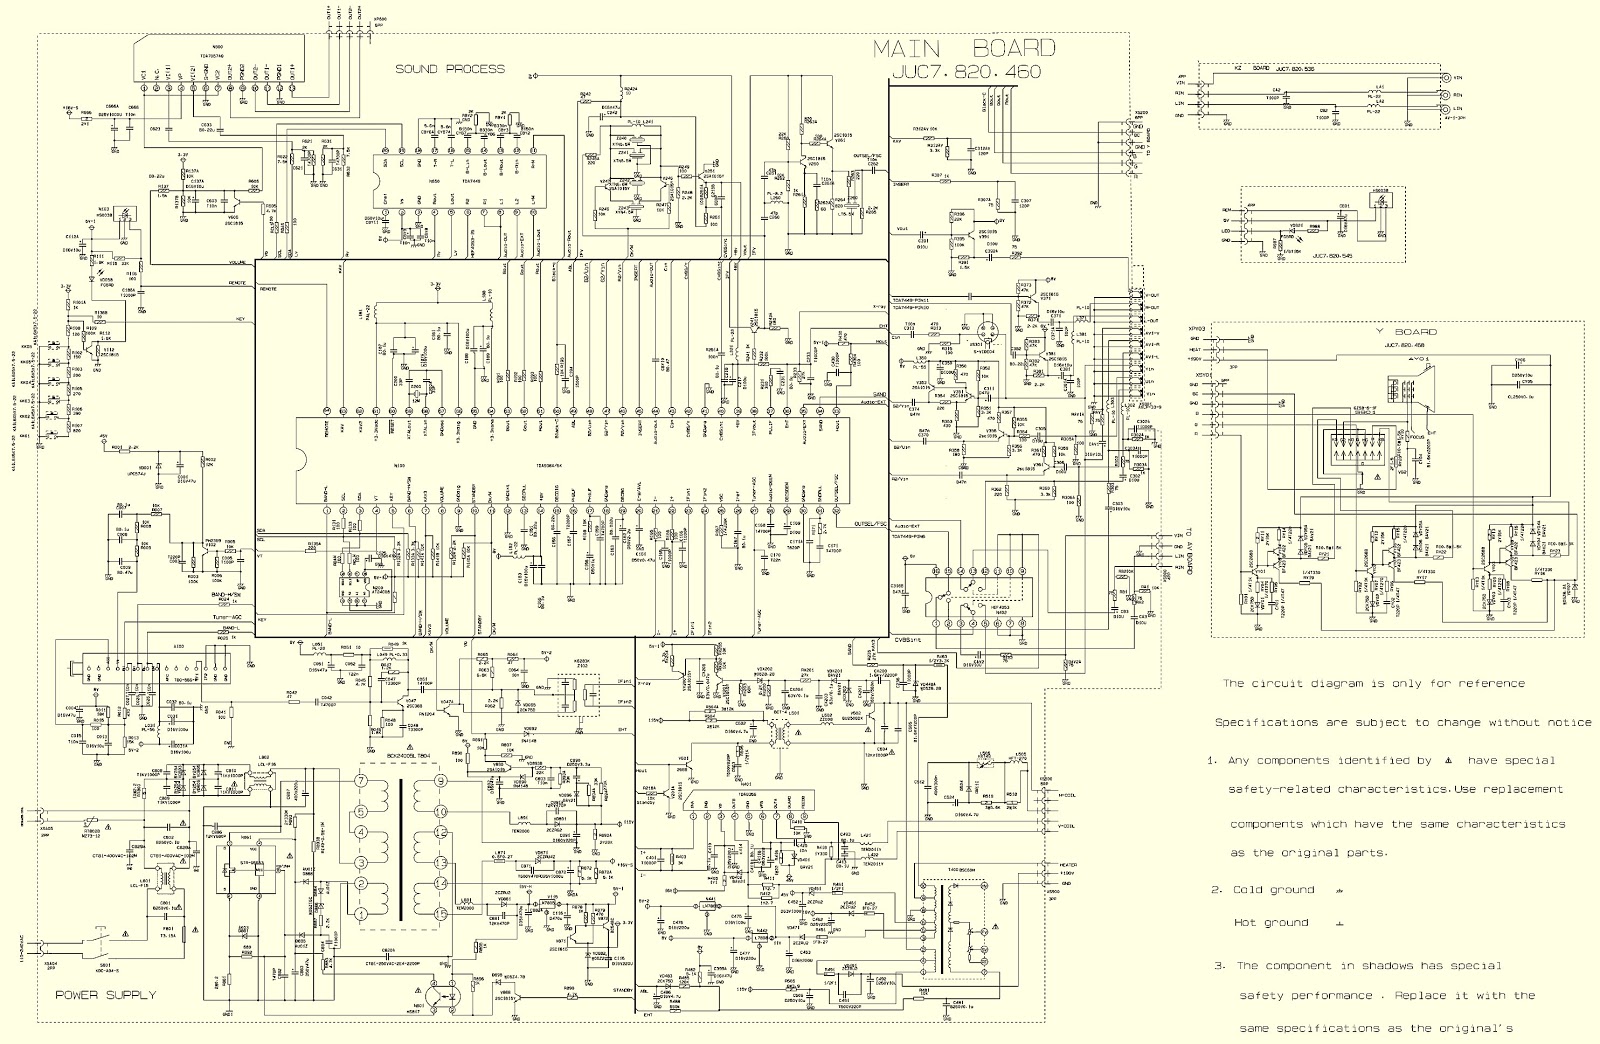
Teledex 21NF55 – Teledex 21PF93 – How to enter service mode – Schematic diagram – CRT Television
DESIGN/SERVICE mode
To enter the USER SERVICE mode
Caution: The user service mode adjustment can be changed only when service personnel adjust the whole set data during servicing. As the control data have dramatic effects on functions and
performance of the TV, service personnel should not tell user how to enter the SERVICE mode to avoid improper data settings.
Set the volume to 0. Then press and hold the MUTE button on the remote control, and press the MENU button on the TV to enter the SERVICE mode. (In this case, the S mode cannot be stored in the EEPROM. To exit from the S mode, turn off the TV set.)
After entering the S mode, Red“ S”is displayed on the upper center of the screen and MENU1 is default. Use the POS+/- buttons to highlight an adjustment and the VOL+/- buttons to adjust
it. The adjusted data are immediately output and stored in the EEPROM.
EX-1A1 chassis series are applied in 21NF55/21PF93 respectively which uses mainly Philips’ advanced UOC-ultimate chip TDA935X/6X/8X and I2C-bus controlled IC. With combination of
microcontroller and small signal processor, the TDA935X/6X/8X series feature high-integration, high-performance-to-price ratio and high-reliability and advanced functions with fewer external
components, which provide much convenience for manufacturing and technical service.
The super chips TDA935X/6X/8X are good in pins compatibility. Differences among them are shown as follows.
TDA9351(48K) PAL/NTSC/SECAM+1 PAGE TELETEST
TDA9350(48K) PAL/NTSC+1 PAGE TELETEST
TDA9361(64K) PAL/NTSC/SECAM+10 PAGE TELETEST
TDA9360(64K) PAL/NTSC+10 PAGE TELETEST
TDA9380(32K) PAL/NTSC
TDA9387(32K) NTSC
To enter the USER SERVICE mode
Caution: The user service mode adjustment can be changed only when service personnel adjust the whole set data during servicing. As the control data have dramatic effects on functions and
performance of the TV, service personnel should not tell user how to enter the SERVICE mode to avoid improper data settings.
Set the volume to 0. Then press and hold the MUTE button on the remote control, and press the MENU button on the TV to enter the SERVICE mode. (In this case, the S mode cannot be stored in the EEPROM. To exit from the S mode, turn off the TV set.)
After entering the S mode, Red“ S”is displayed on the upper center of the screen and MENU1 is default. Use the POS+/- buttons to highlight an adjustment and the VOL+/- buttons to adjust
it. The adjusted data are immediately output and stored in the EEPROM.
EX-1A1 chassis series are applied in 21NF55/21PF93 respectively which uses mainly Philips’ advanced UOC-ultimate chip TDA935X/6X/8X and I2C-bus controlled IC. With combination of
microcontroller and small signal processor, the TDA935X/6X/8X series feature high-integration, high-performance-to-price ratio and high-reliability and advanced functions with fewer external
components, which provide much convenience for manufacturing and technical service.
The super chips TDA935X/6X/8X are good in pins compatibility. Differences among them are shown as follows.
TDA9351(48K) PAL/NTSC/SECAM+1 PAGE TELETEST
TDA9350(48K) PAL/NTSC+1 PAGE TELETEST
TDA9361(64K) PAL/NTSC/SECAM+10 PAGE TELETEST
TDA9360(64K) PAL/NTSC+10 PAGE TELETEST
TDA9380(32K) PAL/NTSC
TDA9387(32K) NTSC
Circuit diagram & PWB
Click on the pictures to zoom in
Professional technician for all kind of electronic equipment. Doing since 1974.
Thursday, August 18, 2016
RCA 24V12T – RCA 27V412T – RCA 32V432T – CRT TV schematic
Professional technician for all kind of electronic equipment. Doing since 1974.
Insignia NS-LCD32-09 32″LCD TV power, SMPS and LVDS circuit diagram
Professional technician for all kind of electronic equipment. Doing since 1974.
Wednesday, August 17, 2016
Philips AL695 – FM-AM radio – Schematic
Professional technician for all kind of electronic equipment. Doing since 1974.
Friday, August 5, 2016
Samsung LN23R51B - LN26R51B TFT-LCD TV - MONITOR – SMPS circuit diagram.
Professional technician for all kind of electronic equipment. Doing since 1974.
Wednesday, August 3, 2016
Behringer B2031 Schematic - Active 2 way reference studio monitor speakers
As is always the case with a two-way active monitor, each B2031 is equipped with two separate power amplifiers – one for the low frequency driver and one for the tweeter (150 watts and 75 watts respectively). The low frequency polycarbonate driver is 22cm in diameter and the high frequency duties are handled by a one-inch ferofluid-cooled titanium dome tweeter. The crossover circuitry consists of an active fourth-order Linkwitz-Riley filter kicking in at 2kHz. The enclosure also employs a bass reflex porting system to extend the low frequency drivers’ overall frequency response down to a quoted 50Hz. Other features of the B2031s worthy of note include: protection circuitry to look after the drivers and amplifiers in the event of overload; and electromagnetic shielding to allow close placement of the B2031’s to TV screens and computer monitors without interference.
At the back of the B2031s you’ll find a metal
amplifier housing which extends about an inch or so beyond the dimensions of
the speaker enclosure itself (H:W:D 400 x 250 x 290mm). The balanced XLR, balanced/unbalanced TRS and 240 volt IEC power cord all connect vertically upwards
into the amplifier housing, leaving the back of the B2031s free of plugs
jutting out at right angles. This arrangement makes it much easier to place
these monitors close to rear walls – not the best placement, admittedly, but
sometimes necessary. The rear panel of
the B2031 is also where you’ll find a number of active controls. These include:
Input Trim – which adjusts the B2031’s input sensitivity to the signal source;
Low Frequency cut – for adapting the B2031s to an additional subwoofer system;
Room Compensation – which rolls off bottom-end relative to wall/corner
placement (0, - 2, -4, -6dB); and High Frequency – which compensates for the
amount of high frequency damping in the monitor environment (0, +2, -2, -4dB).
High and low driver mute switches are also included, which the manual suggests
are for maintenance and servicing only – although found them quite useful while setting up, as
they allowed to get a feel for the
individual speaker components. First
impressions of the B2031’s were clearly centered on their extended bottom-end
and the impressive definition and detail in their stereo imaging. After much
listening, and a bit of tweaking of the rear-panel settings, the B2031s did a
creditable job of matching themselves to my particular monitoring environment –
particularly in their ability to modify the bottom end in order to compensate
for their less-than-ideal close-proximity to walls and corners.
A first mix on the B2031s – played back on a number
of passive monitors I usually use – revealed a few home truths about the
differences in working with passive and active monitor designs. Although the
essential balance of the mix held up impressively when played back on the passives,
overall it sounded a bit lifeless. All that wonderful detail and definition
that oozes out of the B2031s gets lost among the inherent limitations of your
typical near field passive monitors. In essence, you still need to ‘work the mix’
on the B2031s – sweetening it up, adding punch and color as the music requires
– so as to get the mix to translate effectively into the all-pervasive passive
world. From the first time I heard
active reference monitors I was a convert – particularly since I had the
advantage of comparing a set of active monitors right alongside a passive
version from the same manufacturer. The passive pair contained identical
speaker components to the active monitors and were being powered by an
amplifier of quite reputable design. The difference was such that it didn’t
take an audiophile to pick which monitors had more detail and definition.
The Behringer TRUTH B2031s follow in this grand tradition
of the active monitor. They certainly grabbed my attention from first listen
and continued to impress after countless listening sessions and mixes. At their
current price-point the B2031s will certainly keep the competition honest – as
well as leaving many similarly priced passive speaker/external amplifier
combinations sounding somewhat lifeless.
Professional technician for all kind of electronic equipment. Doing since 1974.
Subscribe to:
Posts (Atom)